
Well, I attempted moving my blog, and I could never get everything set up just right. So I have finally caved, and re-opened this blog. Lots of craziness going on....busy with orders, the kiddos are home for the summer....oh, but the first day of school is closing in quick! Lots of new ideas going on, and I cannot wait to get busy!
On a similar note....tomorrow (or actually today! YIKES) starts the beginning of Project Runway. And I had this c~r~a~z~y idea....what if....I do a kid's version of their assignment for each show?!?!? See, told ya! C~R~A~Z~Y!! I know they do their outfits in only a day or two, but I'm giving myself a few extra days...after all....they don't have children to play with, dishes to wash, meals to cook, laundry piling up, and so on and so on...so I think I deserve a few extra days. =)
Happy Sewing!
Wednesday, July 27, 2011
Tuesday, June 8, 2010
And I'm Back! And Moving!
It's been a while, I know! I took a bit of time to reorganize, regroup, and just catch up on life in general. But now I'm back, and inspired! I have drifted from Etsy and Artfire a bit and started my own website. Go check it out! You know you want to! I have also decided to make a little change with the blog. I have moved my blog to my website now. So look for the link on the left to keep updated. =)
Saturday, August 22, 2009
Alyssa's Birthday!
Today was my baby's birthday. She turned 4. I can't believe it! I remember being so scared to go in and have her, since she was my first child. And I was scheduled for induction so I had to be at the hospital so early that morning. And those that know me...well, you know how much I hate mornings! LOL After way too many hours of labor, and her being difficult, Dr. Darby finally offered a c-section. I don't think I have ever jumped on an offer so fast! So after hours of labor and two epidurals and lots of good drugs...We had our baby girl!
She was 8 lb 2 oz which would explain why I could block the sun with my belly.
So today was supposed to have been her b-day party. Unfortunately she caught a cold yesterday and she is miserable. So we cancelled the party, and we had cake and presents here. I promised her we would have her party next Saturday. I just hate that the one time her b-day is actually on a Saturday...she gets sick. =(
I will have to post pictures of her party next week!
Tuesday, May 19, 2009
The Best Custom Paper Designer / Graphic Artist On Etsy!

I recently had the opportunity to work with a wonderful lady on Etsy. And she was amazing! And she saved my skin! HAHA! So here's what happened....
I procrastinated. Again. And we all know what happens then. Something goes wrong. And it went WAY wrong! I thought I had all of my lingerie shower invitations ready to be printed and mailed. Then I discover...well, let's just say....not good print job. I really didn't have a lot of time to completely re-do everything, so I turned to Etsy for help. Within minutes of posting an Alchemy request for only one specific graphic, I began receiving bids. Some crazy high bids...bids for the entire invitation....bids for the invitation and they mail them. None of which appealed to me, of course!
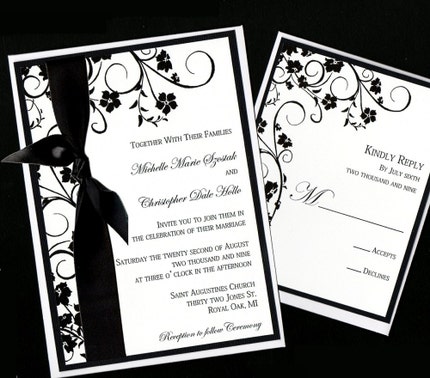
And then Michelle Hollo of HolloDesigns came along. I was super impressed by her ability to...well, read my mind! In around 30 minutes, she had a completed image for me. It was exactly what I was looking for. And at a really unbeatable price!
Thanks to her, my invitations were awesomely cool....and they were mailed on time. (The picture is the invitation I made from it. I blurred the important details, sorry guys! LOL)
Be sure to check out her shop! She has gorgeous.....
wedding invitations & programs........
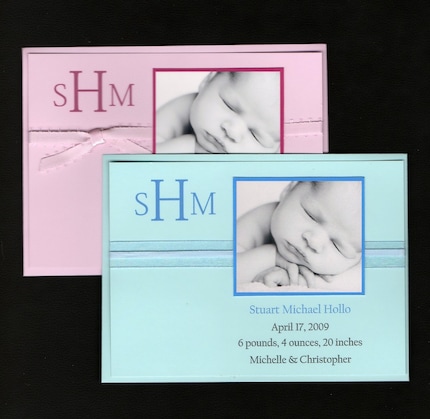
Personalized Notecards.............

Super Cute Baby Announcements, and more!!!
Tuesday, May 12, 2009
M & M's Melt In Your....HUH?
 So it has definitely been a rough couple of weeks for me. Besides the craft shows sapping all my energy, my sweet children have been replaced by....I don't know....someone else's children!
Last week, the kids had been really good, so I took them to the store, gave them each $1 and let them pick out a candy. M & M's (plain, not peanut, thank goodness, but you will find the reason for that in a moment) for both. Great! Means no fighting for once! LOL
So we get home, and I am attempting to get some Etsy work done, and I hear Logan coughing a little funny. But he looked fine so I went back to my work....until Alyssa starts yelling that Logan's nose is yucky and I need to clean it. Of course, I just assumed his nose was running since this seriously grosses her out. So I grab a baby wipe and call him over. He turns around...and has chocolate running out his nose. Obviously he never knew that M & M's were supposed to melt in your MOUTH, not in your NOSE!! I won't share the pictures, since they are obviously not going to be attractive...but let's just say.....BLACKMAIL!
 So this leads us to yesterday....Alyssa went to her Nanny's so it was just me and Logan. Stupid me....I was thinking that would give me time to get caught up on some custom orders and even get a little housecleaning done. Logan sneaks off into the kitchen and unfortunately was able to reach the Dawn that Daddy had left at the edge of the counter. So he finally came out of the kitchen covered in blue, and that's when I discovered I would soon have a squeaky clean kitchen floor. For those who need clean floors.....don't use Dawn! LOL I had more bubbles than you could imagine, in addition to looking like a beginner ice skater just trying to reach the sink. Sigh...and to think I thought I had an exciting life BEFORE kids!

Wednesday, April 15, 2009
Two Years Ago....At About This Time.......
My water broke while I was attempting to get one last good night's sleep. Little baby Logan just couldn't wait 6 more hours before my scheduled c-section. So off to the hospital we went....and here's some pics.
April 16, 2007 8Lbs 15.4 oz


And NOW!


April 16, 2007 8Lbs 15.4 oz


And NOW!

My handsome boy!
Thursday, April 2, 2009
ARTFIRE

So I have decided to give it a shot...what could it hurt, right? I like only paying $12 / month, no matter how much I list or sell. Just hope I sell enough to cover the $12, right?! The listing is MUCH easier. And faster. I am going to give it 100% and see what happens!
So how about you?? Wanna join? Register on ArtFire.com
Subscribe to:
Posts (Atom)
